Checkout Journey
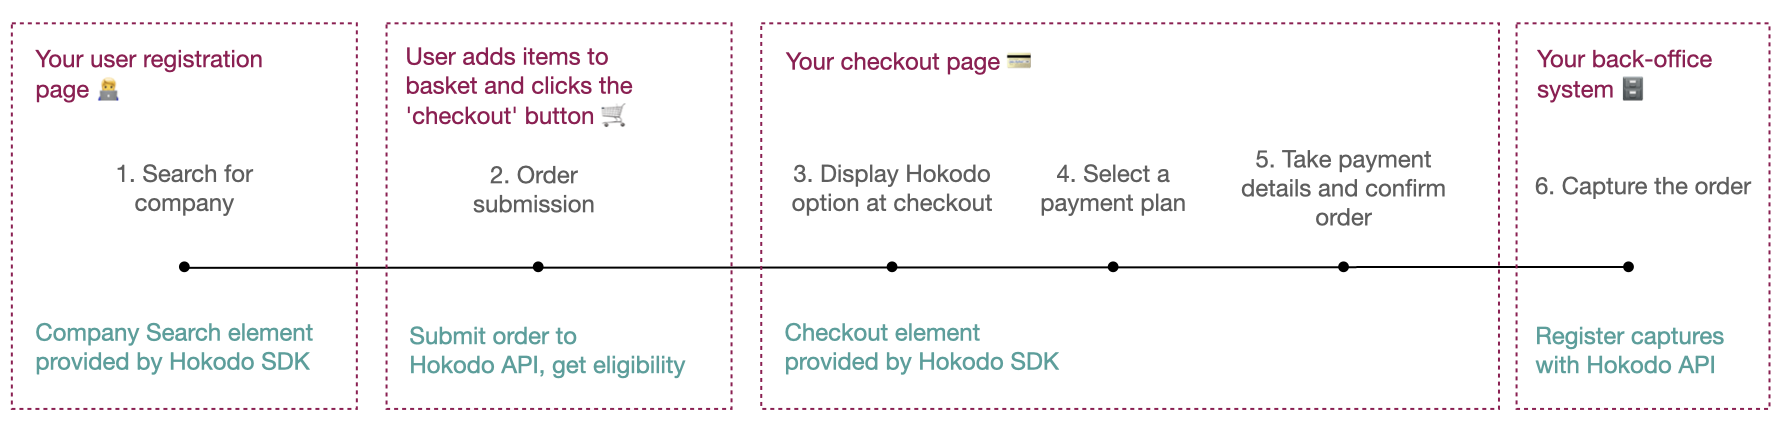
Let's look at a typical customer journey for a Hokodo payment. There are 6 stages to the process, and each is described below in a separate section.
For a live example, see our Demo Merchant Store
This is just one example - you can fit the flow around your site's design.
You can perform the Hokodo parts of the journey at different stages of the user journey, for example you could run the company search after the user clicks "checkout".
See Your Design Decisions for a list of common design choices made during an API Integration.
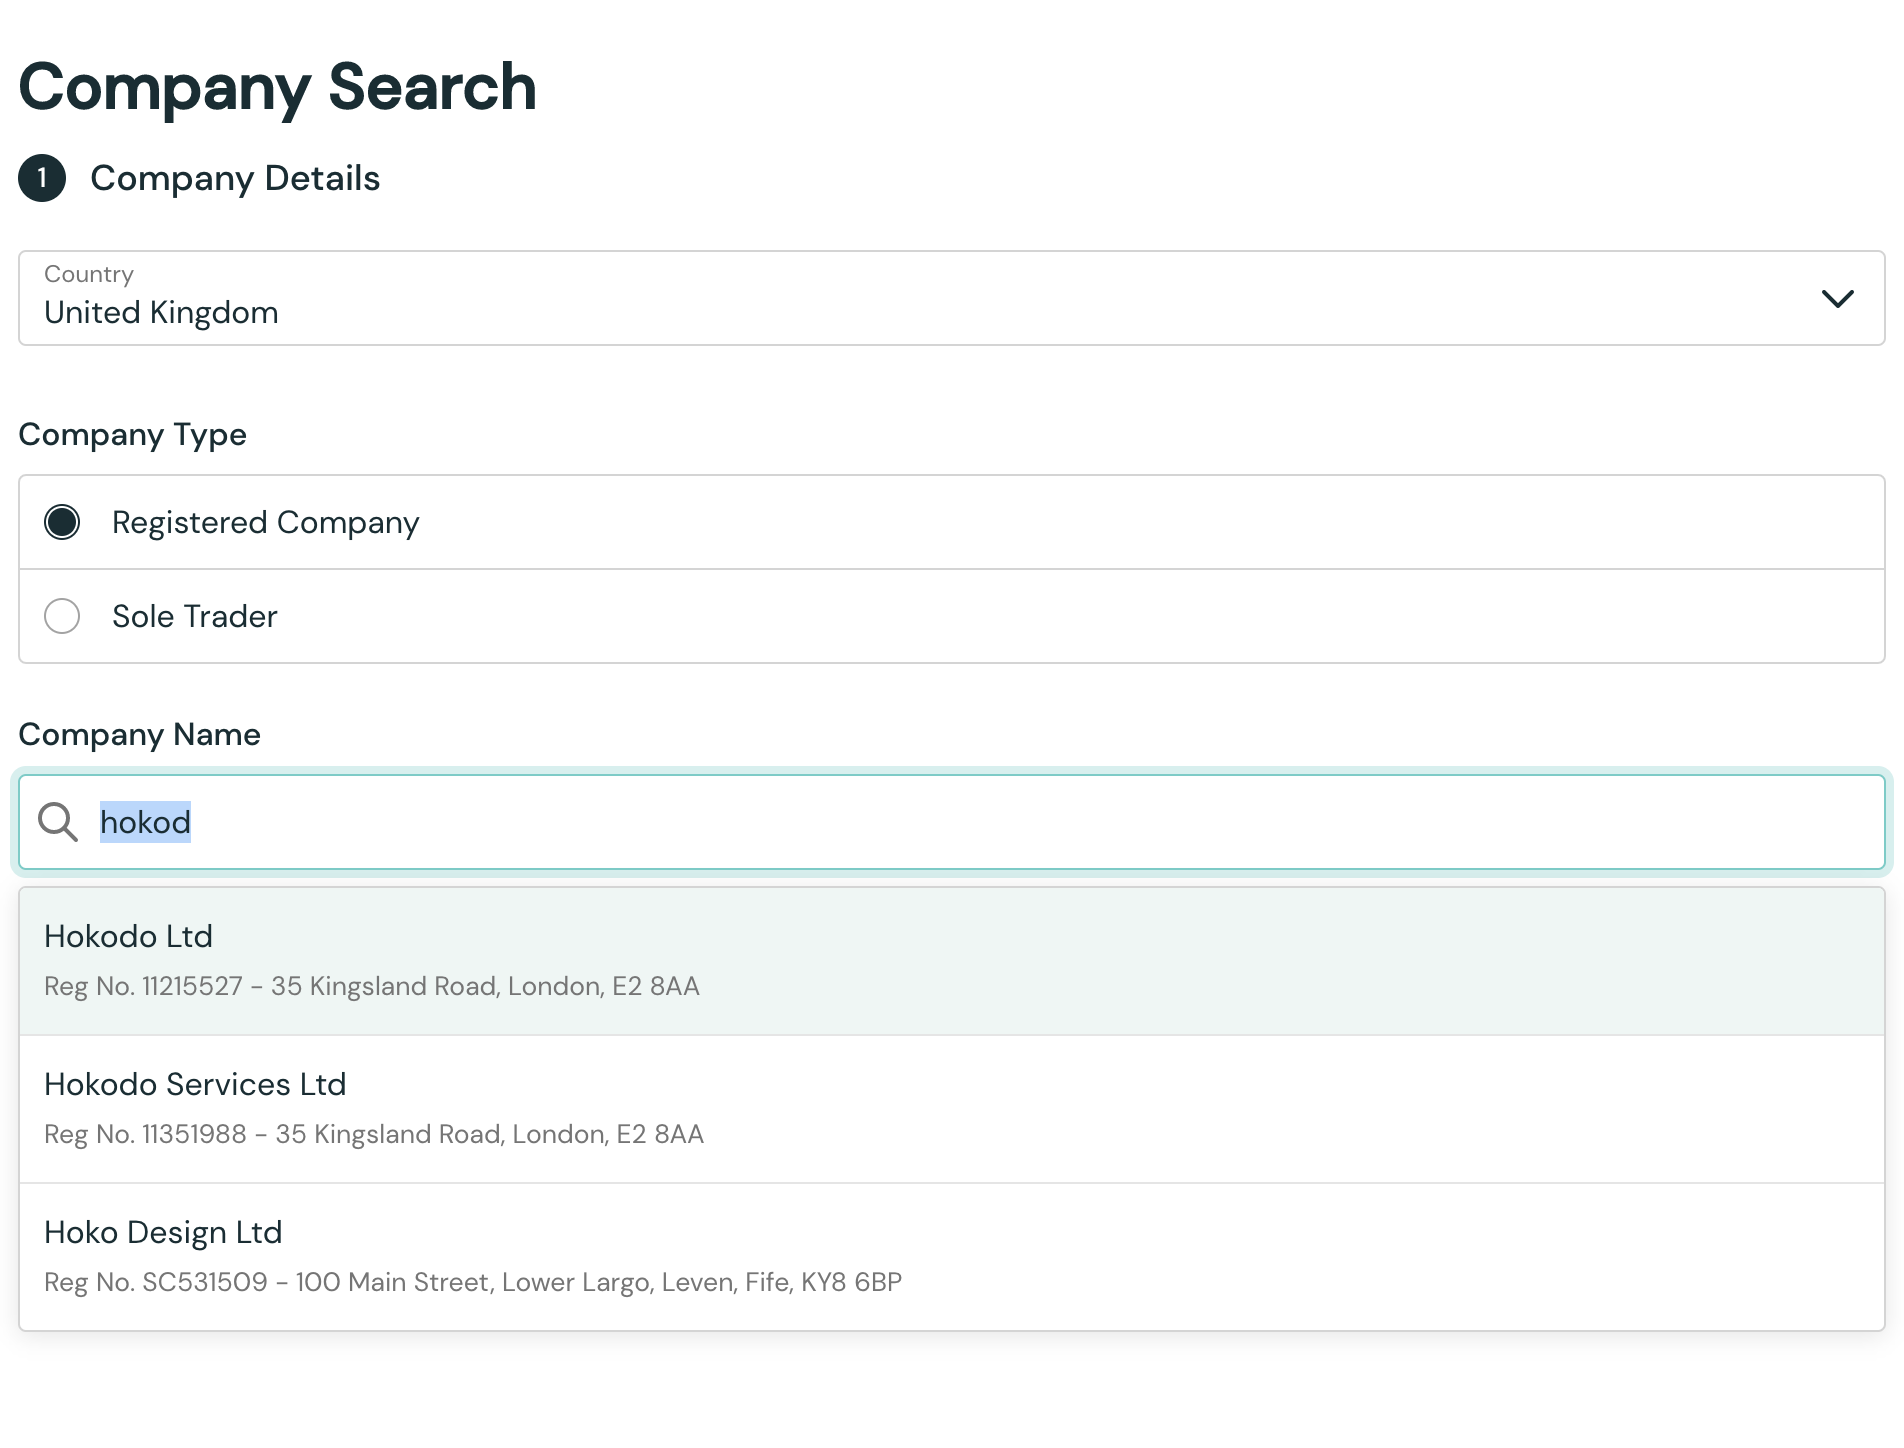
1. Search for company
The customer must identify the company they work for, in order to verify their eligibility to payment terms. Hokodo provides an SDK element for this, which you can use in your user sign-up workflow, or alternatively during checkout.
When the user enters their company name or registration number, Hokodo searches for this company in our database and presents a list of matches. The customer selects the appropriate match.
Company search can be skipped for returning customers. If your customer is registered on your site, you can store the customer's Hokodo User ID in your database, and supply this at checkout time.
See our Company Search In-Depth section for additional information on how it works.
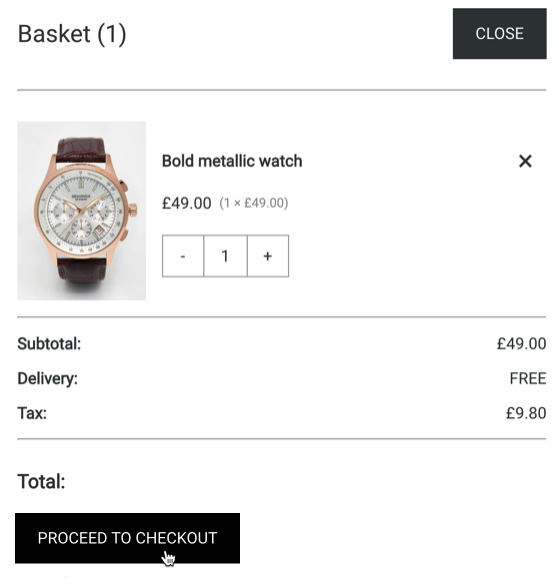
2. Order submission
Having registered, the user shops around on your site and fills their basket with goods.
When they check out, you send the details of their basket to the Hokodo API. Our system checks the payment terms that this user is eligible for on this basket of goods.
3. Display Hokodo option at checkout
Some Merchants display Hokodo alongside other payment options on the checkout page, in the event that payment terms have been offered for the order.
Many merchants have chosen Hokodo to provide their Pay Now payments as well as the Pay Later ones. This means all your payments can be handled with little or no extra integration effort. You can read more about this in In Depth Knowledge.
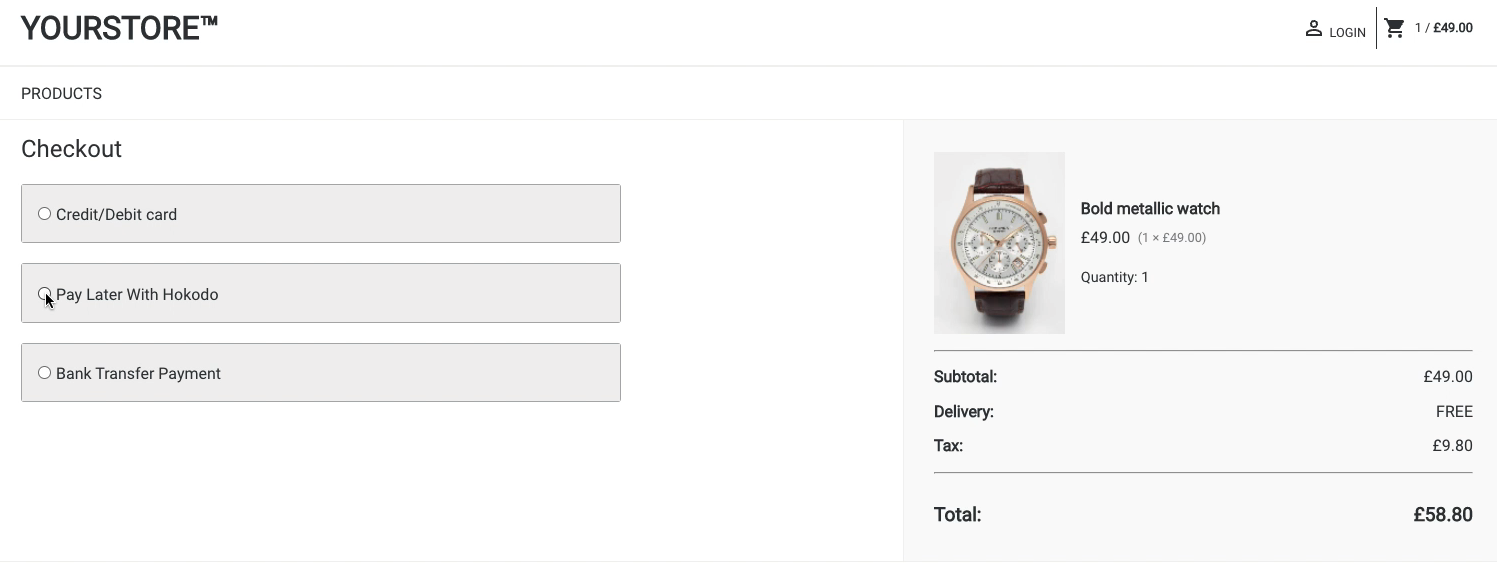
Hokodo's SDK provides a checkout UI element, and you should display this as part of your checkout or integrate it however best meets your needs.
4. Select a payment plan
If a range of payment plan options are available, the customer selects one in the Hokodo SDK checkout.
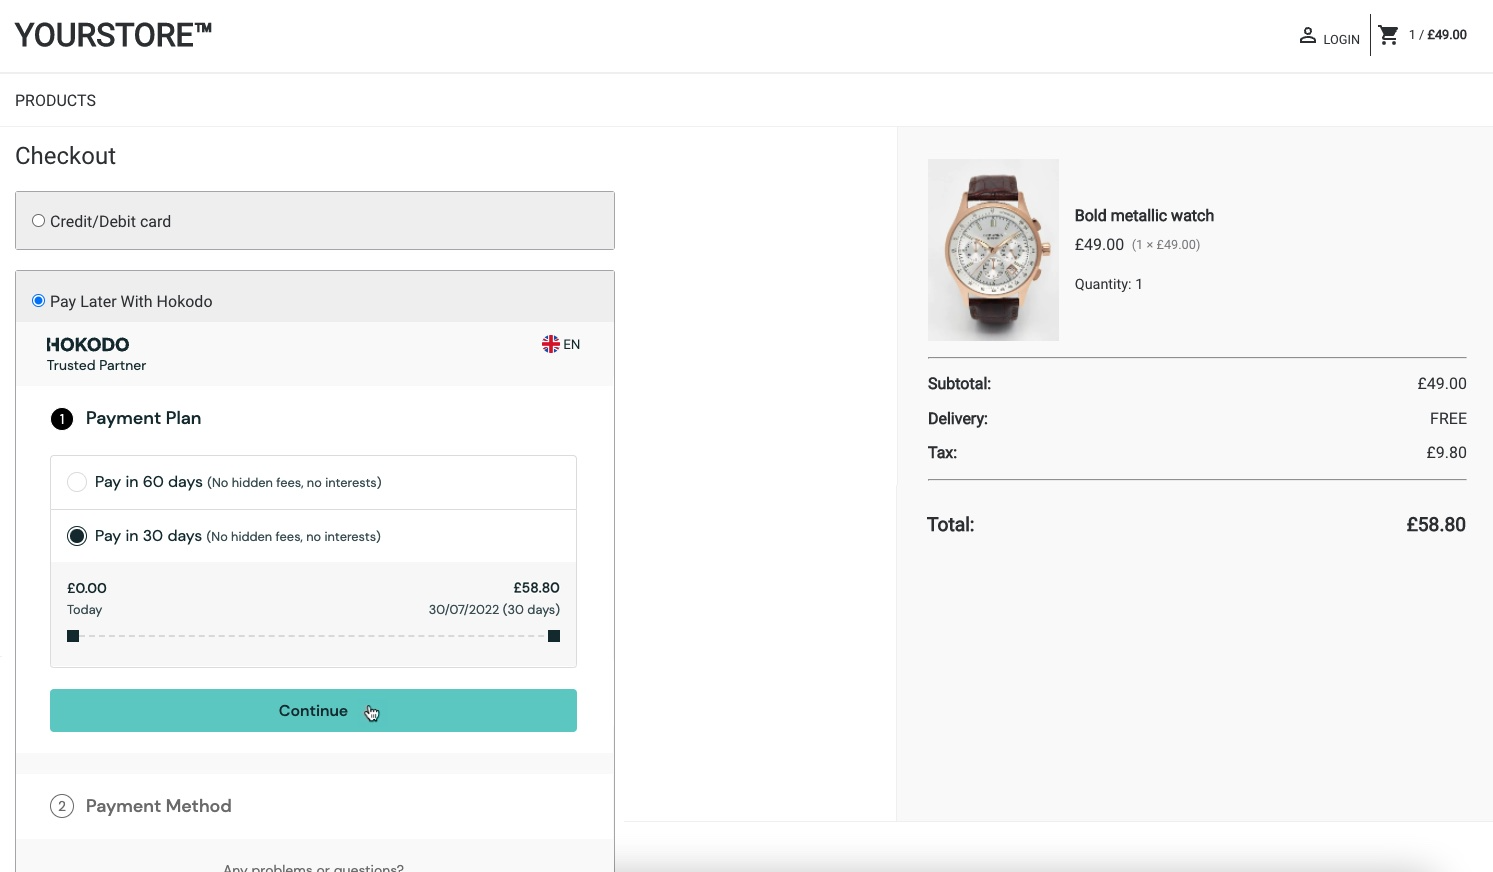
5. Take payment details and confirm order
Next, the customer selects a settlement method (e.g. credit card, direct debit, bank transfer...). This happen within the SDK checkout element.
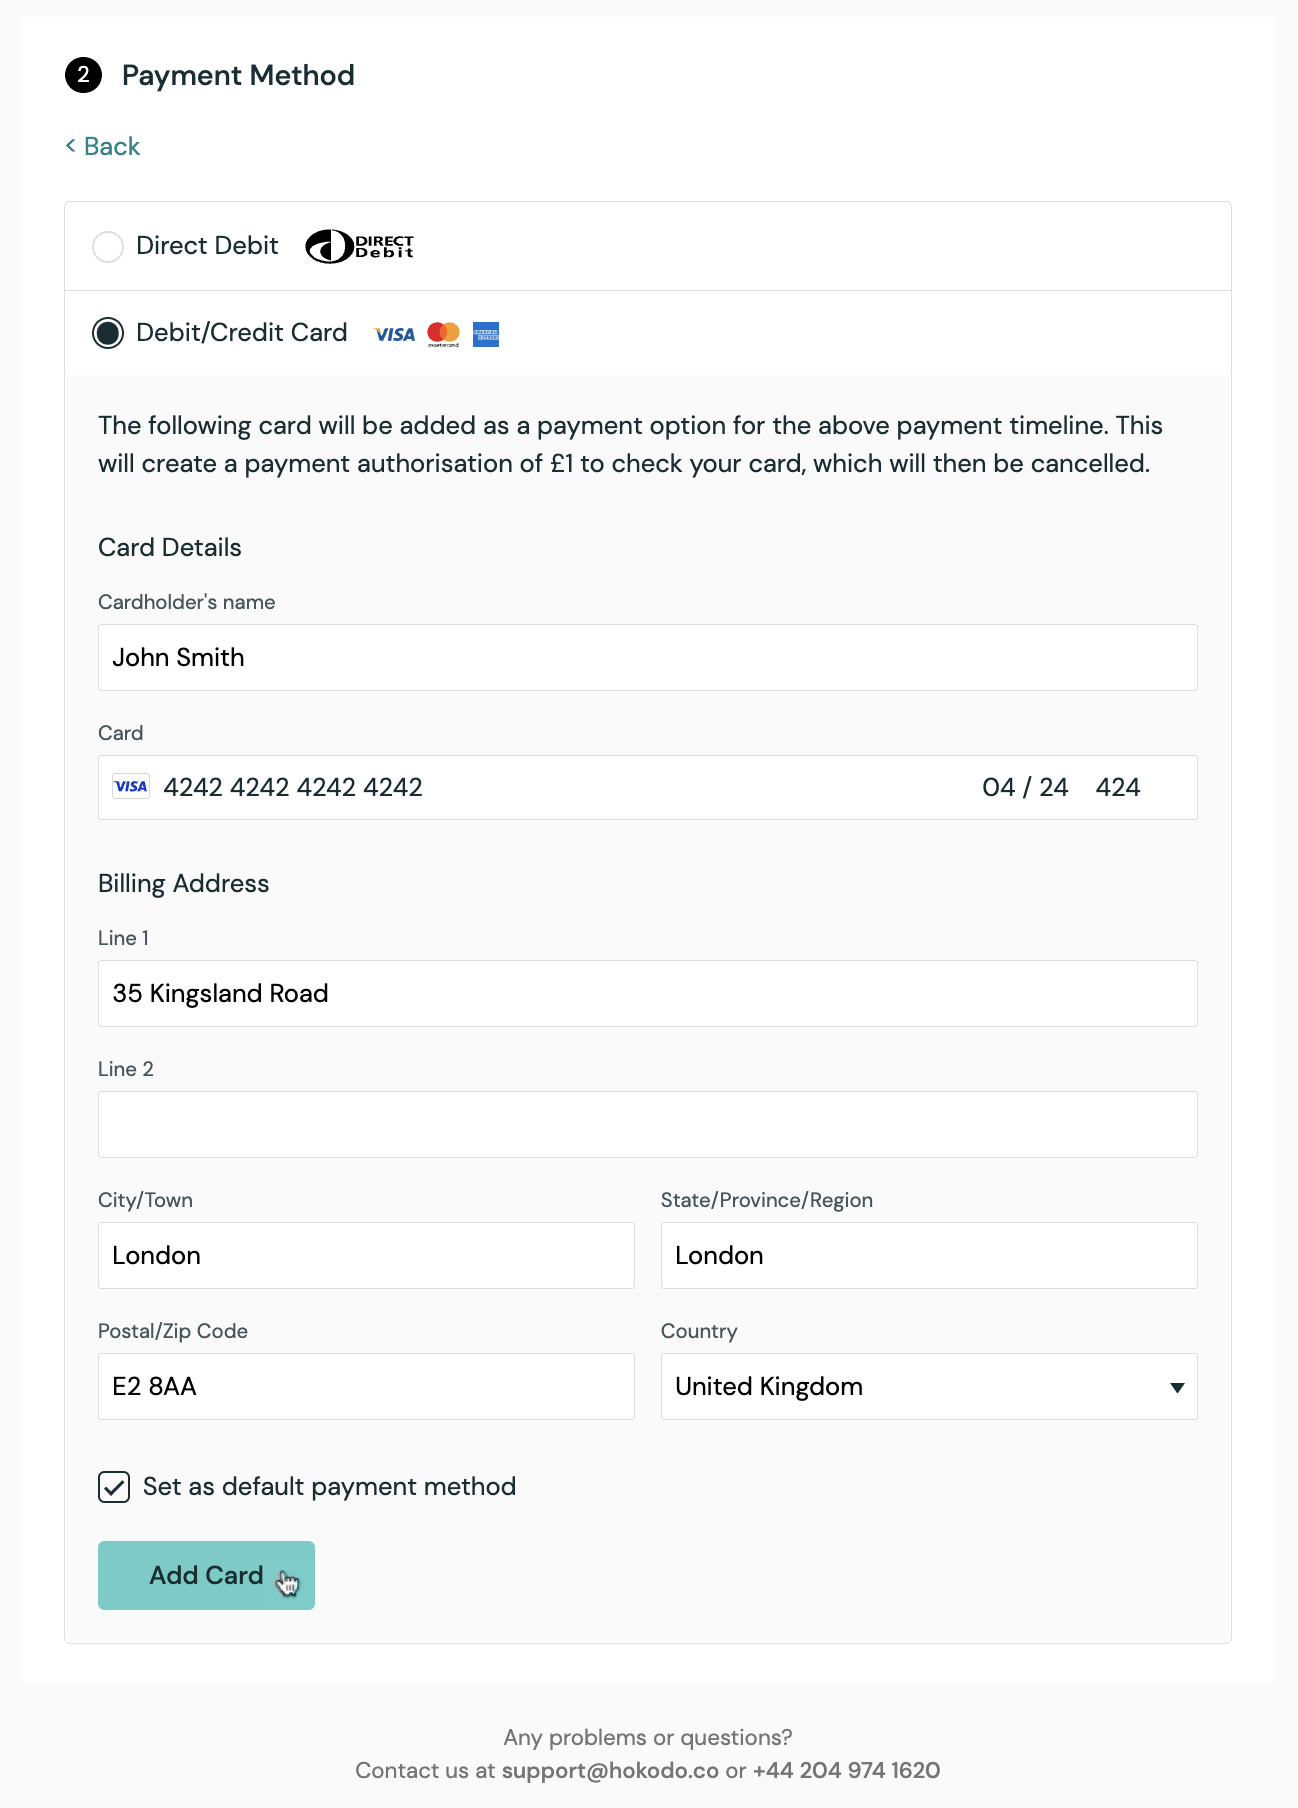
After entering the payment details, the customer clicks the "confirm" button. The SDK sends a request to Hokodo's API to make the final order confirmation.
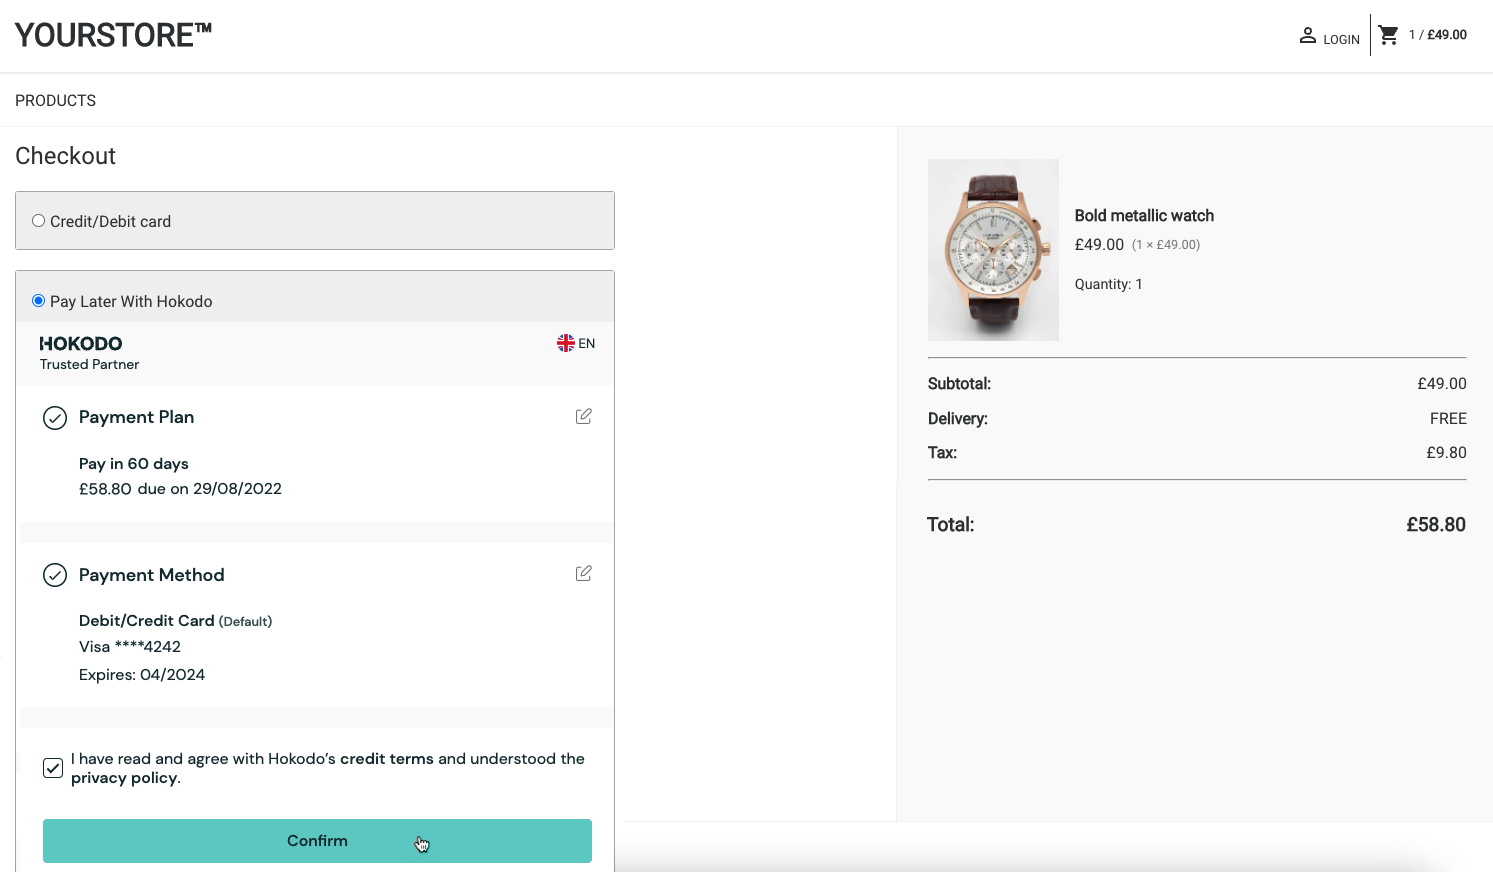
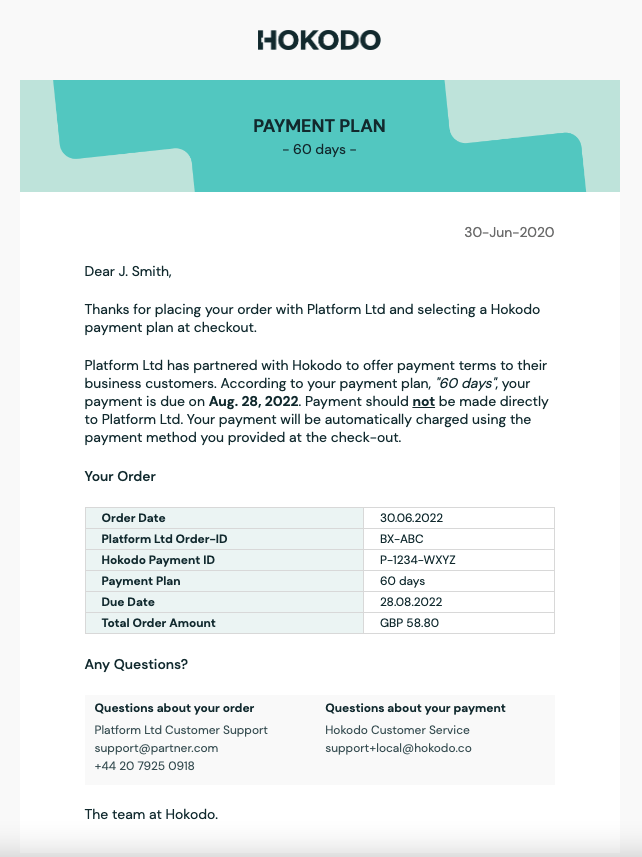
The checkout process is now complete and the customer receives an email confirming their payment terms.
6. Post-sale: capture the payment
When the goods are shipped or services completed, your back-office system makes a Capture API call to inform Hokodo what value of the order has shipped. This is the trigger for us to pay out funds to you for the captured amount. On the due date of the Payment Plan we will charge the buyer the sum of all Captures.
There are also API endpoints to:
- register Refunds (to ensure we collect the correct amount from the buyer), and
- Void authorisation (the credit limit reserved in relation to the order) that is no longer needed.