Full API integration
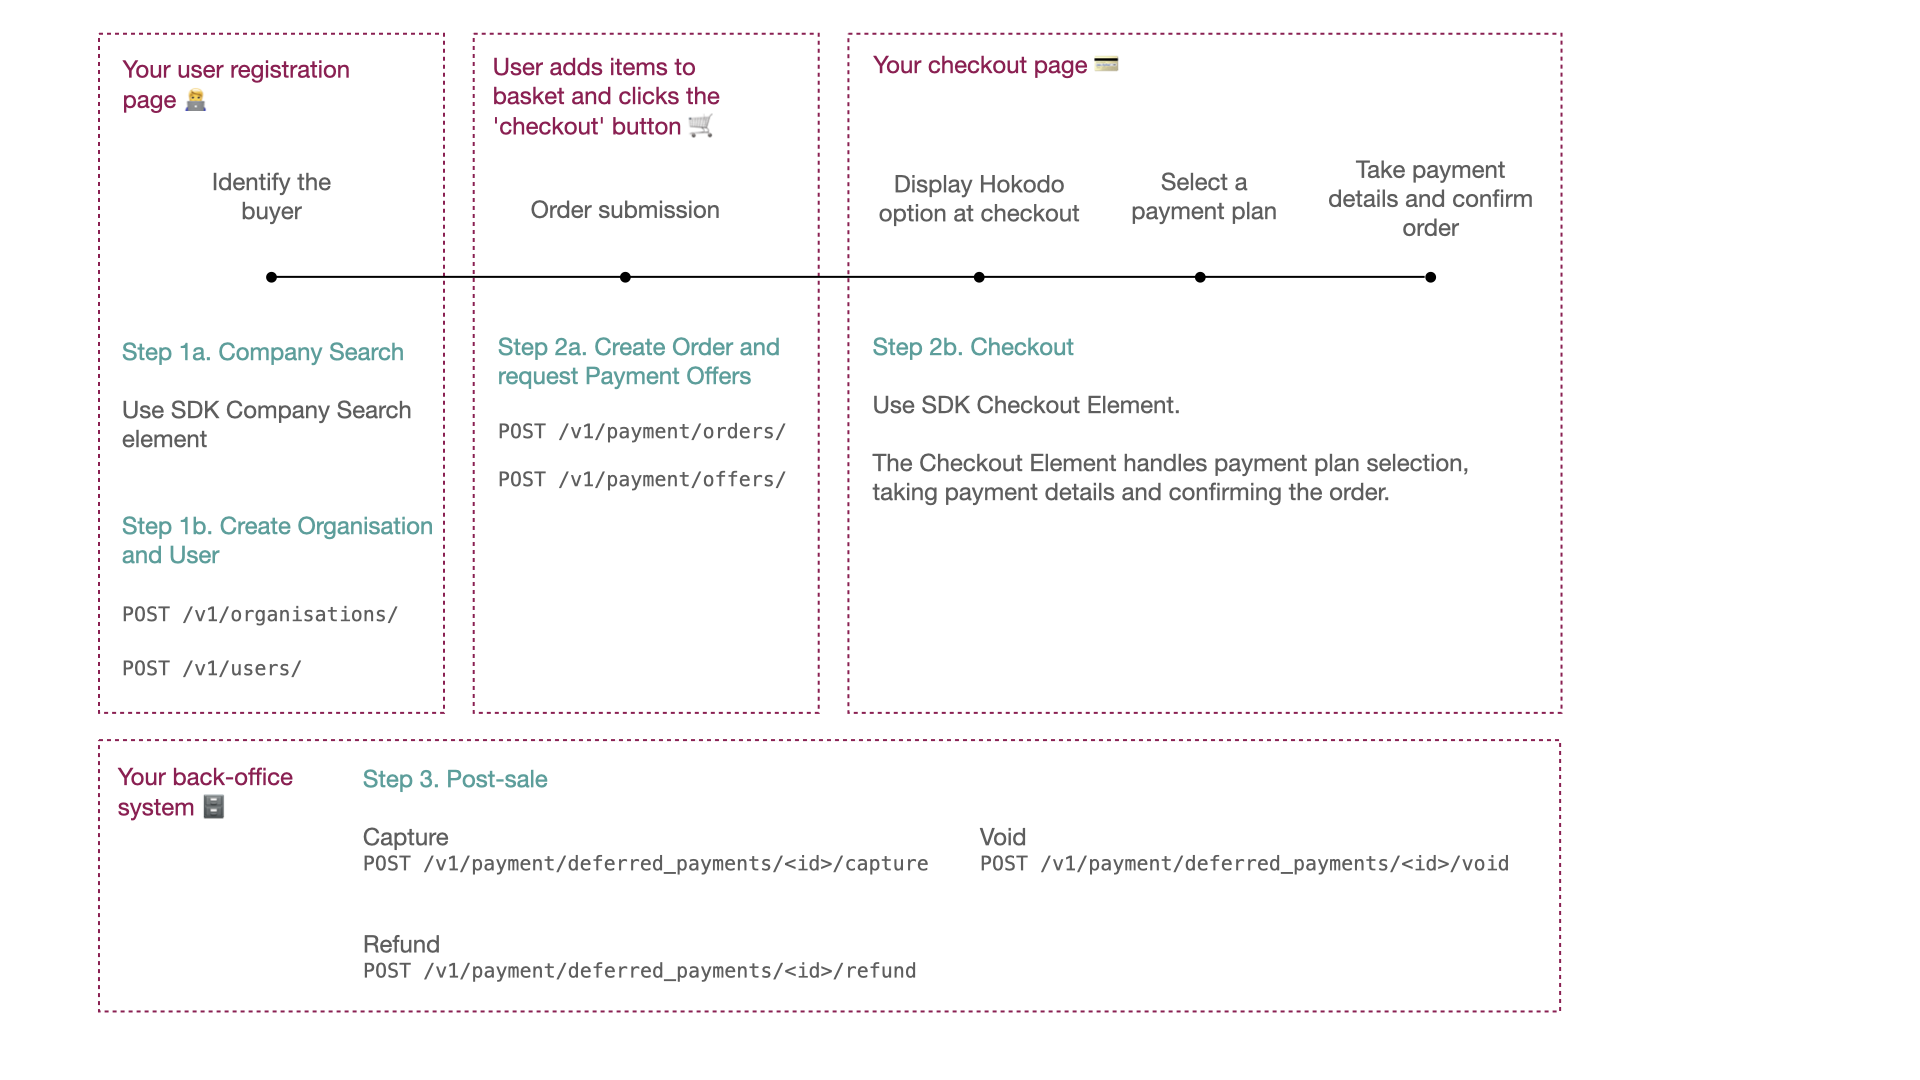
Here we summarise a typical workflow for a checkout scenario. This should give you a relatively quick overview of the sequence of events. The sections below summarise the data involved. For full details, follow the Integration Guide.

The Integration Guide is an in-depth guide to implementing this flow, including the Hokodo SDK which provides the front-end functionality out of the box.
The details of your implementation may differ depending on the design decisions you make, such as when to run the company search.
If you are using one of Hokodo's ecommerce plugins, you do not need to make any API calls directly. The plugin handles this.
You may be interested in this section for a deeper understanding, but it is not required to set up the plugins.
Company search
Postman: Core Flow → Search For a Company
API Reference: Company search
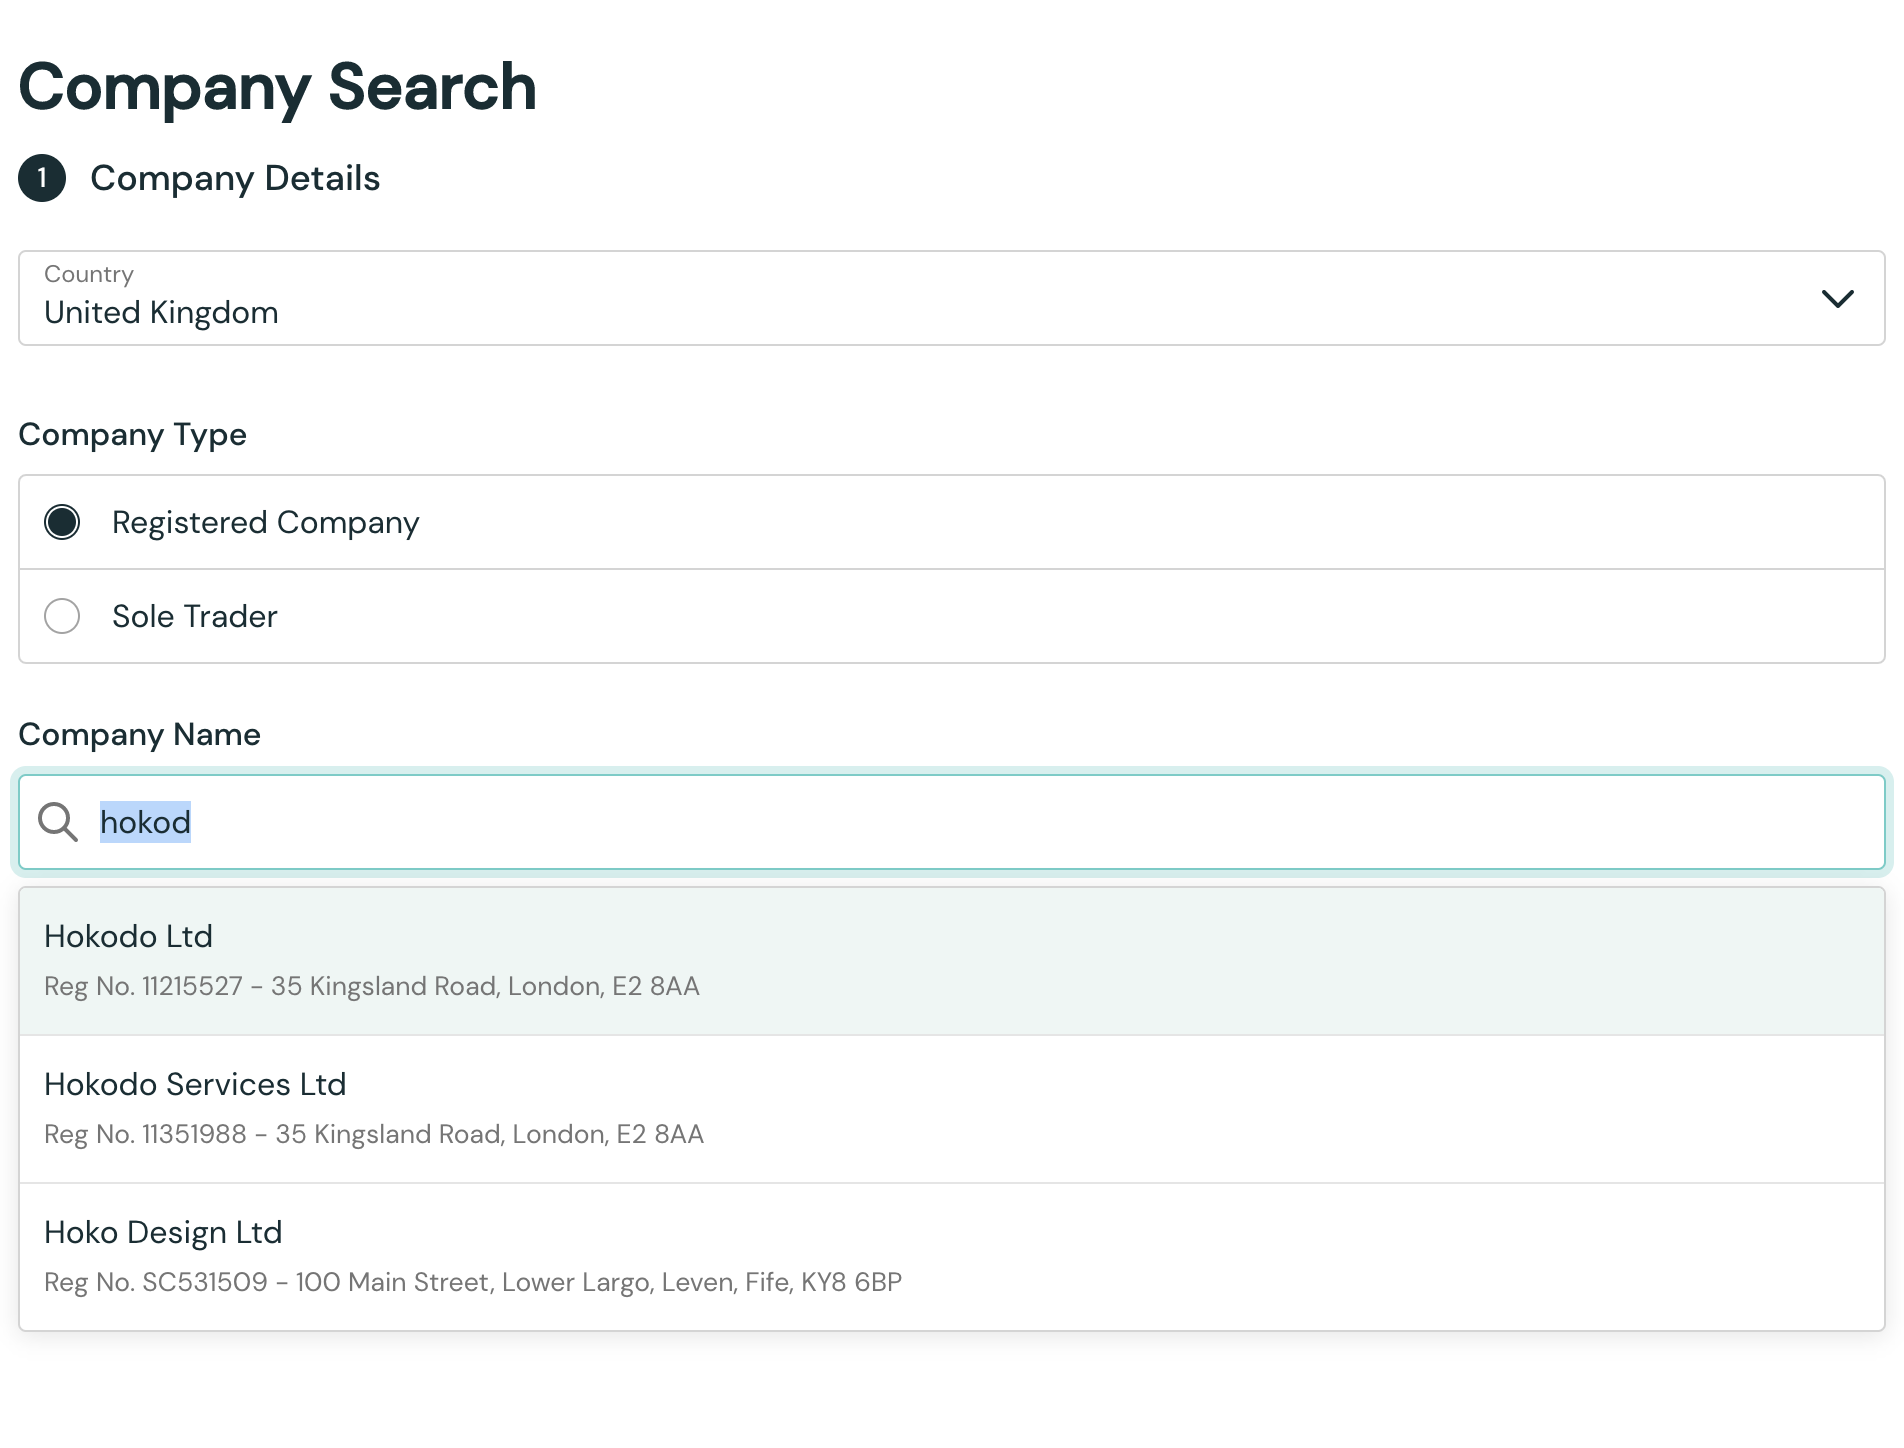
Search for a company by country and company name, or registration number.
First initialise the SDK, then mount the Company Search element like so:
// In your HTML
<div id="hokodoCompanySearch"></div>;

// In your JS
const companySearch = elements.create("companySearch");
companySearch.mount("#hokodoCompanySearch");

See Step 1a of the Integration Guide for full details.
Create Organisation
Postman: Core Flow → Create Organisation
API Reference: Create an Organisation
Create an Organisation object. Every user must be in an Organisation in order to make purchases.
For an in-depth explanation of Organisations, see this page.
POST /v1/organisations HTTP/1.1
Content-Type: application/json
Authorization: Token <your-api-key>

{
  "unique_id": "your-own-unique-id",
  "registered": "2022-04-29T19:52:40.893601Z",  # When the user registered *on your platform*
  "company": "co-imXpeBWFTf6TeEZbgEtK7A"  # Company ID as returned by the Company Search
}
See Step 1b of the Integration Guide for full details.
Create User
Postman: Core Flow → Create a User
API Reference: Create a User
Create a User object for the individual making the purchase.
POST /v1/users HTTP/1.1
Content-Type: application/json
Authorization: Token <your-api-key>

{
  "name": "John Smith",  # Your buyer's name
  "email": "john.smith@example.com",  # Your buyer's email address
  "registered": "2022-04-29T19:56:40.517610Z",  # When the user registered *on your platform*
  "organisations": [
    {
      "id": "org-asrE7fKEuNor5CaVQD4Ah5",
      "role": "member"
    }
  ]
}
See Step 1b of the Integration Guide for full details.
Create Order
Postman: Core Flow → Create an Order
API Reference: Create Order
By this point in the flow, the user has a basket of goods and they are ready to checkout.
At some point between your 'checkout' button and your payment page, you create an Order. Here's a shortened version of the request showing the main fields:
POST /v1/payment/orders HTTP 1.1
Content-Type: application/json
Authorization: Token <your-api-key>

{
  "unique_id": "your-unique-order-id",
  "customer": {
    "type": "registered",
    "organisation": "org-asrE7fKEuNor5CaVQD4Ah5",  # The customer's Organisation ID from Step 1b
    "user": "user-WFOMowqyUjpv8JeihXn5Xh",  # The customer's User ID from Step 1b
    "delivery_address": {
      ...
    },
    "invoice_address": {
      ...
    }
   },
  "status": "draft",
  "currency": "GBP",
  "total_amount": 300000,
  "tax_amount": 60000,
  "order_date": "2022-04-29",  # The date the order was placed *on your platform*
  "items": [
    ...
  ]
}
See Step 2a of the Integration Guide for full details.
Request Payment Offers
Postman: Core Flow → Create an Offer
API Reference: Request a New Offer
This is the point where you ask Hokodo for the payment terms available for this Order.
It is mandatory to specify a "notification" URL to receive status updates as the payment progresses (specifically,
when the Deferred Payment object's status changes). The status update
is sent as a webhook - an HTTP request from our server to the "notification" URL you provided.
POST /v1/payment/offers HTTP 1.1
Content-Type: application/json
Authorization: Token <your-api-key>

{
    "order": "order-YrG5y79iuxTTEpkzPbaqcX",
    "locale": "en-gb",
    "urls": {
        "success": "",
        "failure": "",
        "cancel": "",
        "notification": "https://backend.your-site.com/payment/notifications",
    },
    "metadata": {
        "any-key": "Any additional data you want to store against the offer (optional)"
    }
}
See Step 2a of the Integration Guide for full details.
Non-API: Checkout
Postman: Core Flow → Manually complete the payment in your browser
SDK: Checkout Element
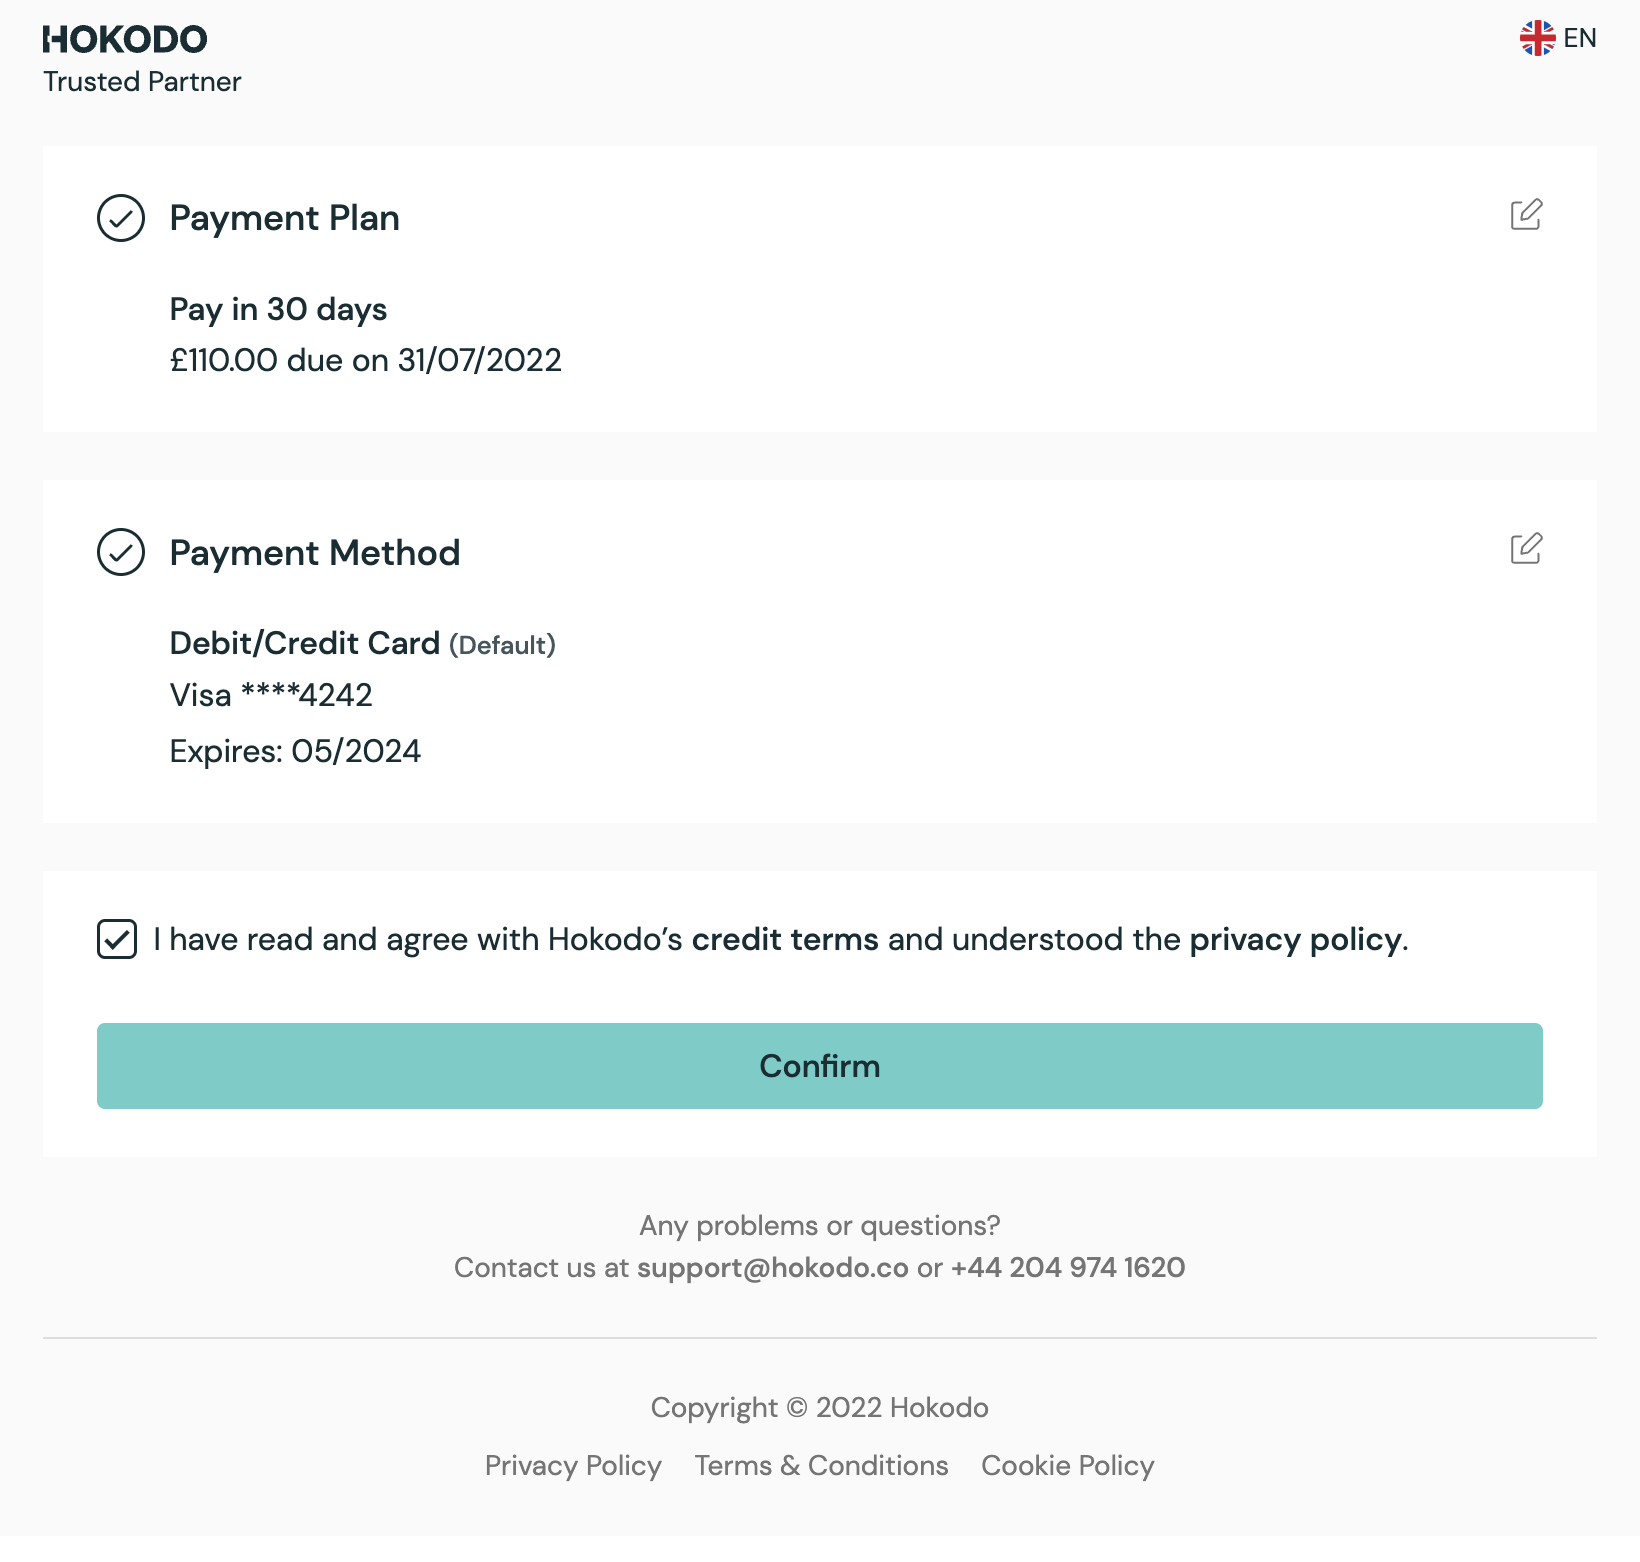
At this point, the user checks out using the SDK's Checkout Element. There are no API calls for you to make here.
After this step, the user has committed to paying for the order. A Deferred Payment object is created in the Hokodo backend.
Initialise the SDK, then mount the Checkout element like so:
// In your HTML
<div id="hokodoCheckout"></div>;

// In your JS
const checkout = elements.create("checkout", {"paymentOffer": ..., "paymentPlanId": ...});
companySearch.mount("#hokodoCheckout");

See Step 2b of the Integration Guide for full details.
Post-sale: Capture Deferred Payment
Postman: Core Flow → Notify Hokodo that order is completely fulfilled
API Reference: Capture
When the Deferred Payment is created, we resereve the total value of the order as authorisation against your customer's credit limit.
When goods have been shipped (or services provided), you capture the Deferred Payment. This instructs Hokodo that payment can be collected on the due date. The authorisation becomes captured.
Upload Order documents at the point of capture. Note: Invoice uploads are mandatory for going live with Hokodo.
It is possible to only capture part of the authorisation that was reserved for the Deferred Payment.
There is also a post-sale endpoint for refunding captured amounts, and an optional endpoint for voiding authorisation that is no longer required for the order. We can configure authorisation to void automatically ("expire") after a set time period if that suits your use case. Speak to your Customer Success Manager to decide this.
PUT /v1/payment/deferred_payments/<deferred_payment_id>/capture HTTP/1.1
Content-Type: application/json
Authorization: Token <your_api_key>

{
  "amount": 30841,
    "metadata": "Shipment #ab1947fg"
}
See Step 3 of the Integration Guide for full details.
Summary: Full sequence of requests
The full sequence of API calls is:
# Company search handled by SDK, then:
POST /v1/organisations
POST /v1/users/

# When the user is ready to checkout:
POST /v1/payment/orders
POST /v1/payment/offers

# Complete the payment in the SDK UI, then inform us about
# captures and refunds:
POST /v1/payment/orders/<order_id>/documents
PUT /v1/payment/deferred_payments/<deferred_payment_id>/capture
PUT /v1/payment/deferred_payments/<deferred_payment_id>/refund